30枚の写真をつなぎ合わせて1枚のパノラマ写真に!Stiched 30 pictures to make a huge a- panorama picture!
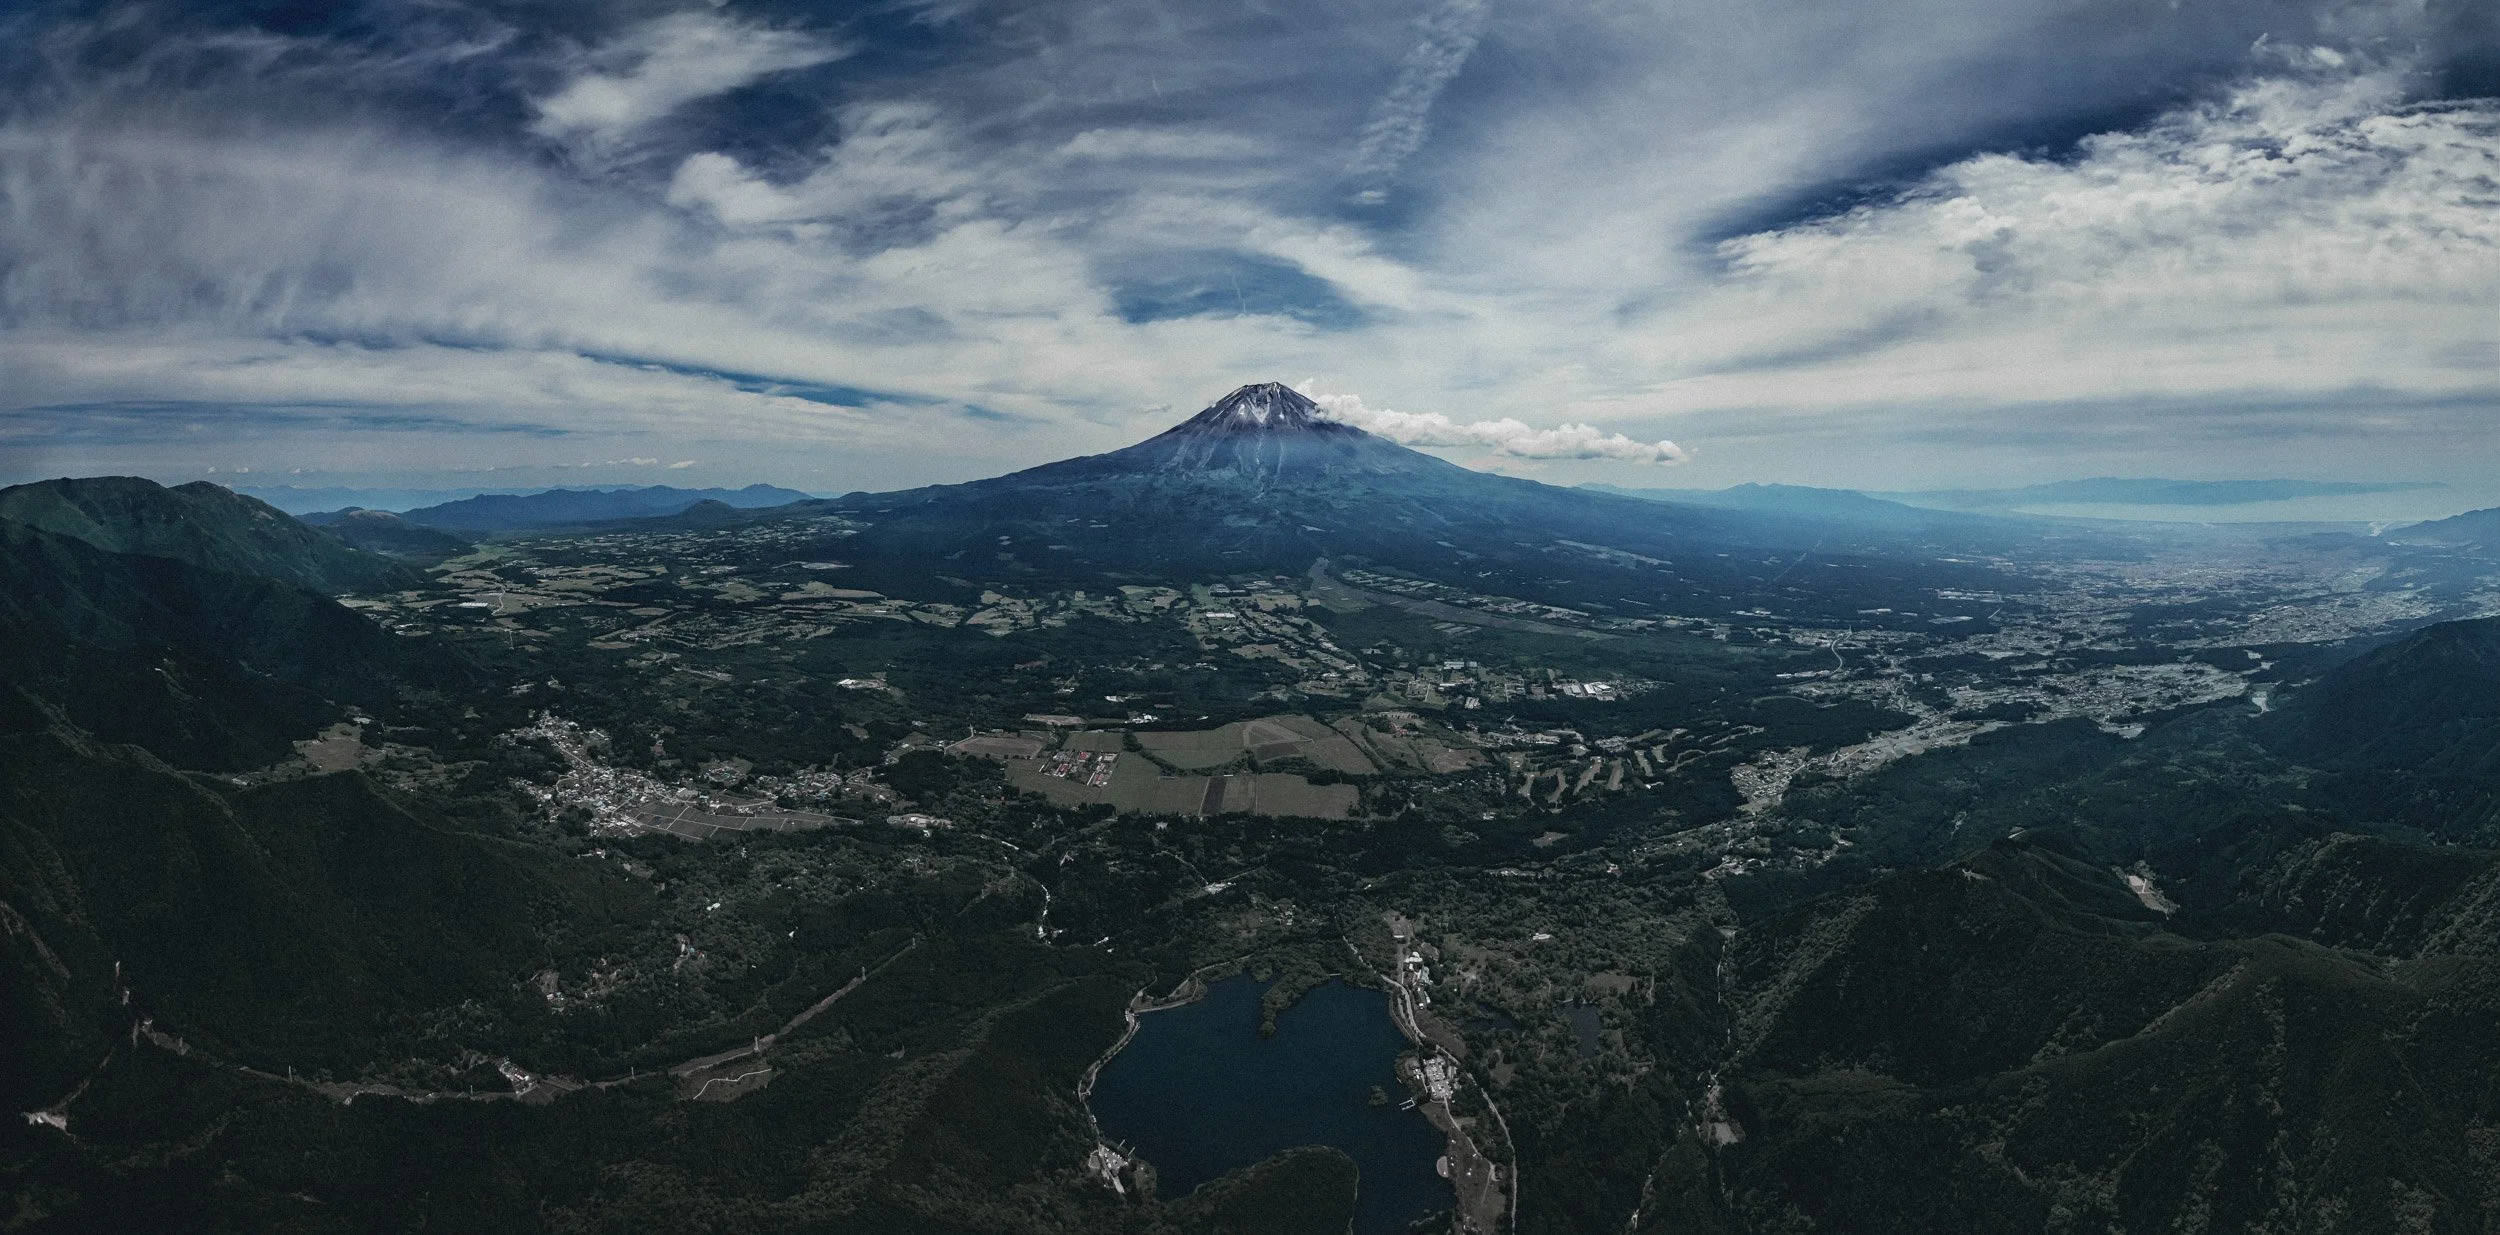
朝霧でフライト中に撮った写真です。確か高度は1,700mくらいだっと思います。
ダイナミックな地形が素晴らしいですよね。
This is a photo taken during a paragliding flight. I believe the altitude was about 1,700 meters. Enjoy the view of Mt.Fuji from sky.
実はこの写真はパラグライダー飛行中に撮った写真なのですが、ただ「パシャ!」と一枚撮ったわけではありません。
ちょっと特殊な撮り方、いや、作り方をした作品なんです。
Actually, this photo is not a simple, normal shot. It is created using a special shooting method.
空中で高度を上げて一番お気に入りのポイントへ。
そこでコンパクトカメラ取り出して縦位置に持って右から左へ連写で撮っています。撮った写真は約30枚。
家に帰って写真編集ソフトにて「スティッチング」と言われる技術をつかって写真をつなぎ合わせました。
そう。複数の写真をくっつけて1枚にしているんです!なので9500万画素(約1億万画素!)と写真も超ビッグ!
Photoshopの完成したデータは1.3GBありましたwww
I increased the altitude in the air to reach my favorite spot. There, I took out a compact camera and held it in a vertical position, capturing continuous shots from right to left. I took about 30 photos. After the shooting, I used photo editing software to stitch the photos together. Yup, I'm combining multiple photos into one! So the photo is also super big, with 95 mega pixels (approximately 100 mega pixels!). The completed data in Photoshop was 1.3GB, lol.
スティッチングした直後の写真はこんな感じです↓
Here is what the photo looked like immediately after stitching
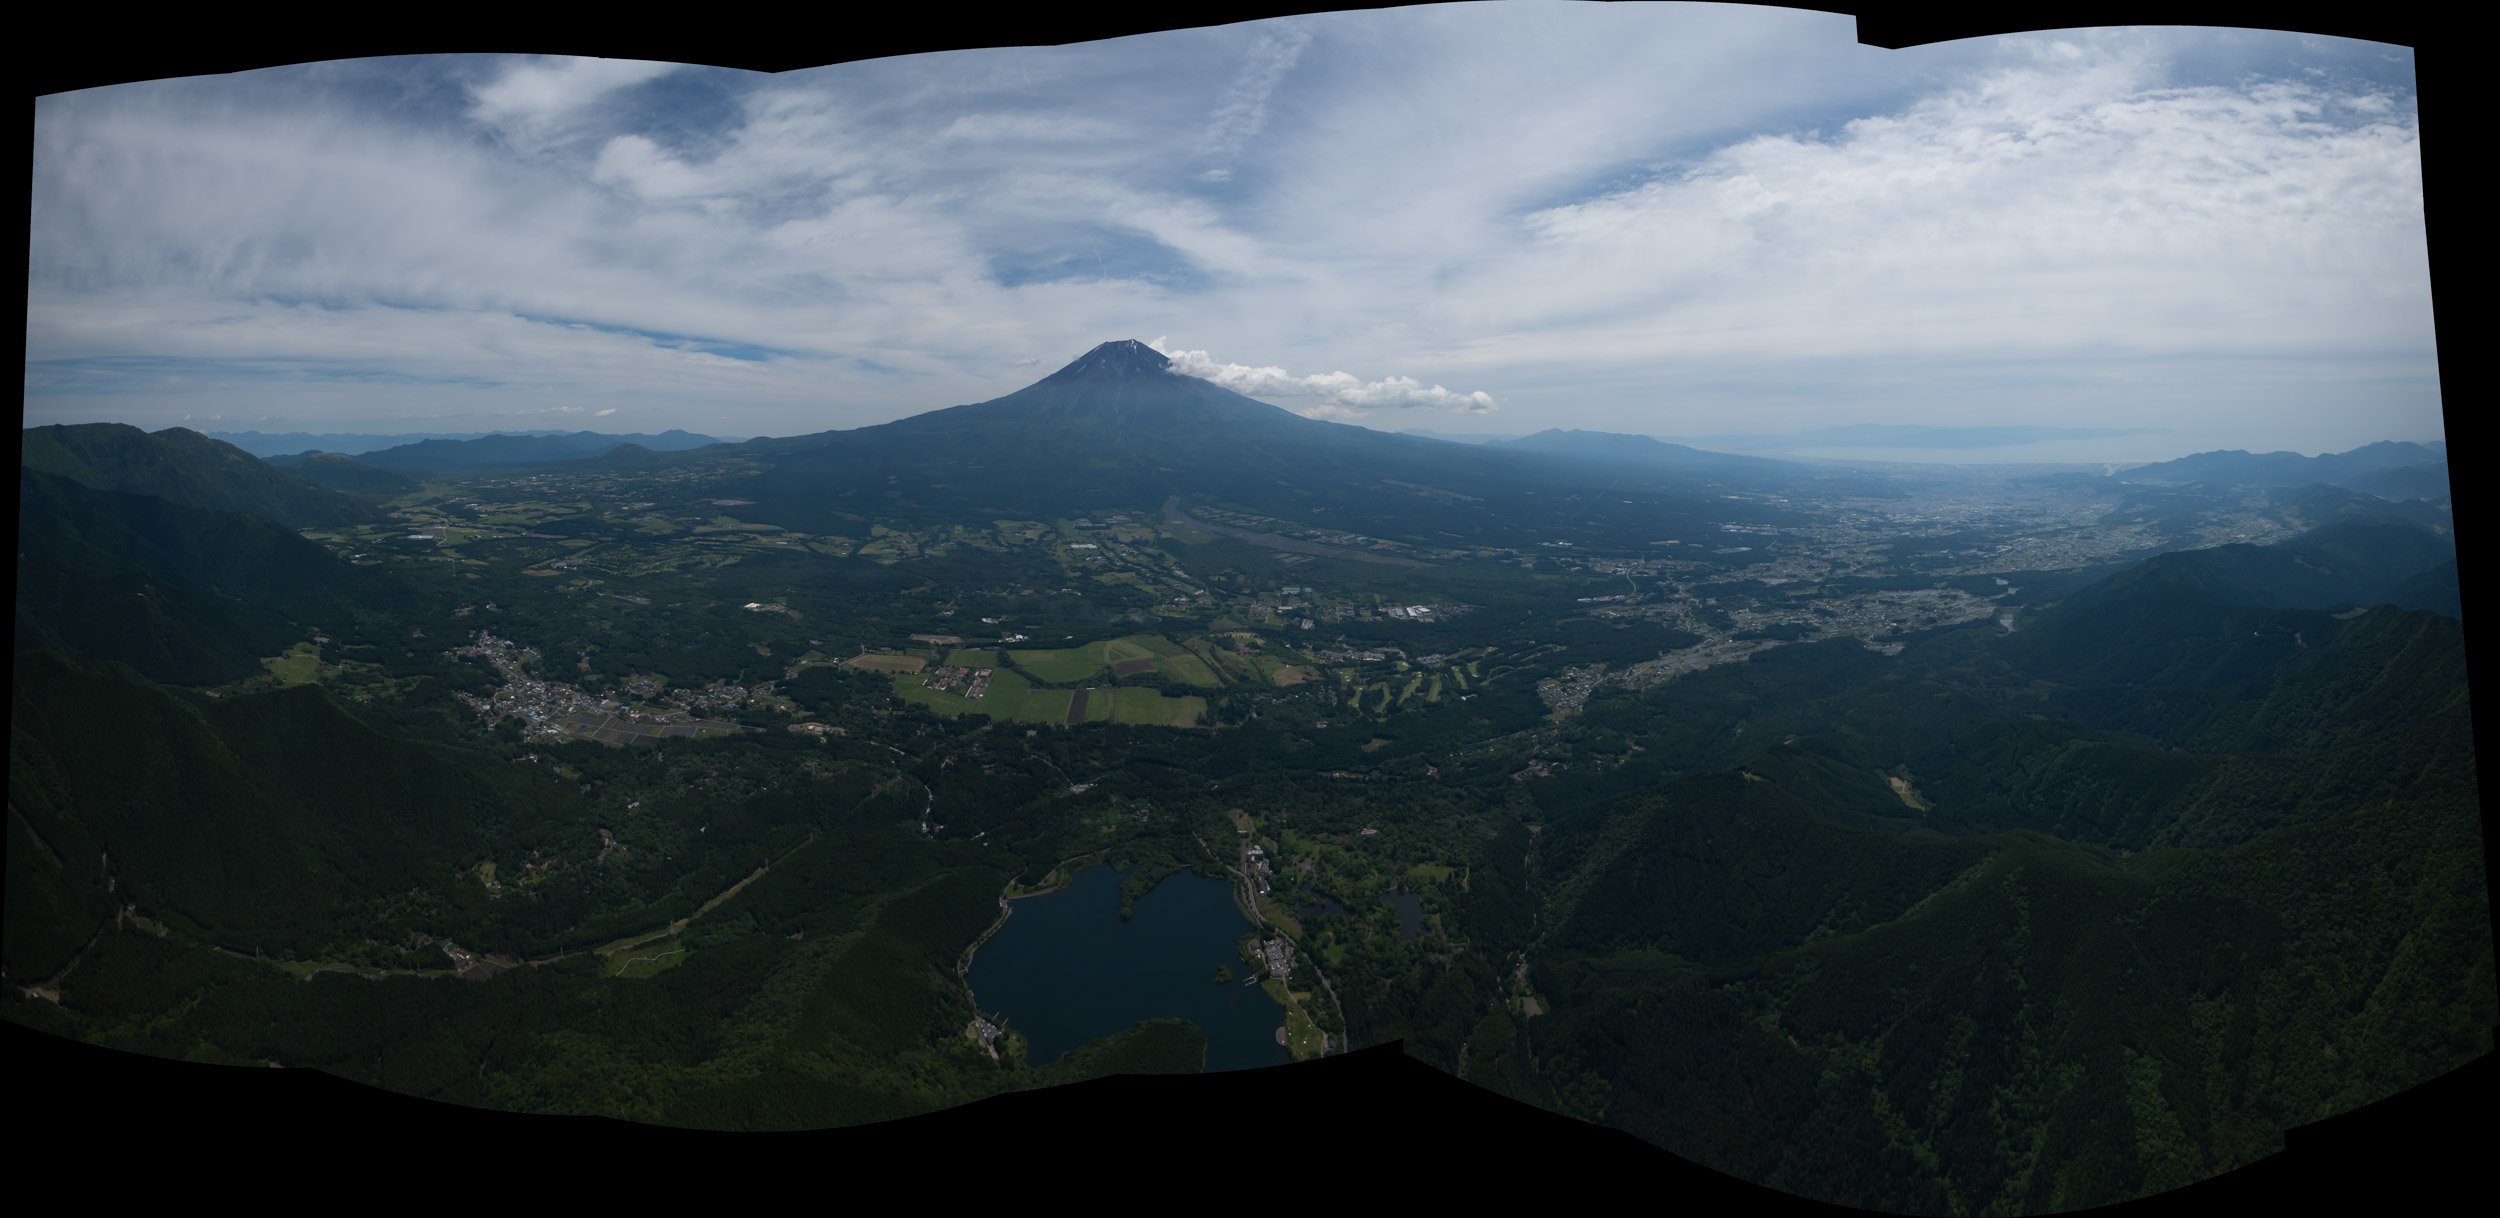
写真編集ソフト CaptureOneにてスティッチング
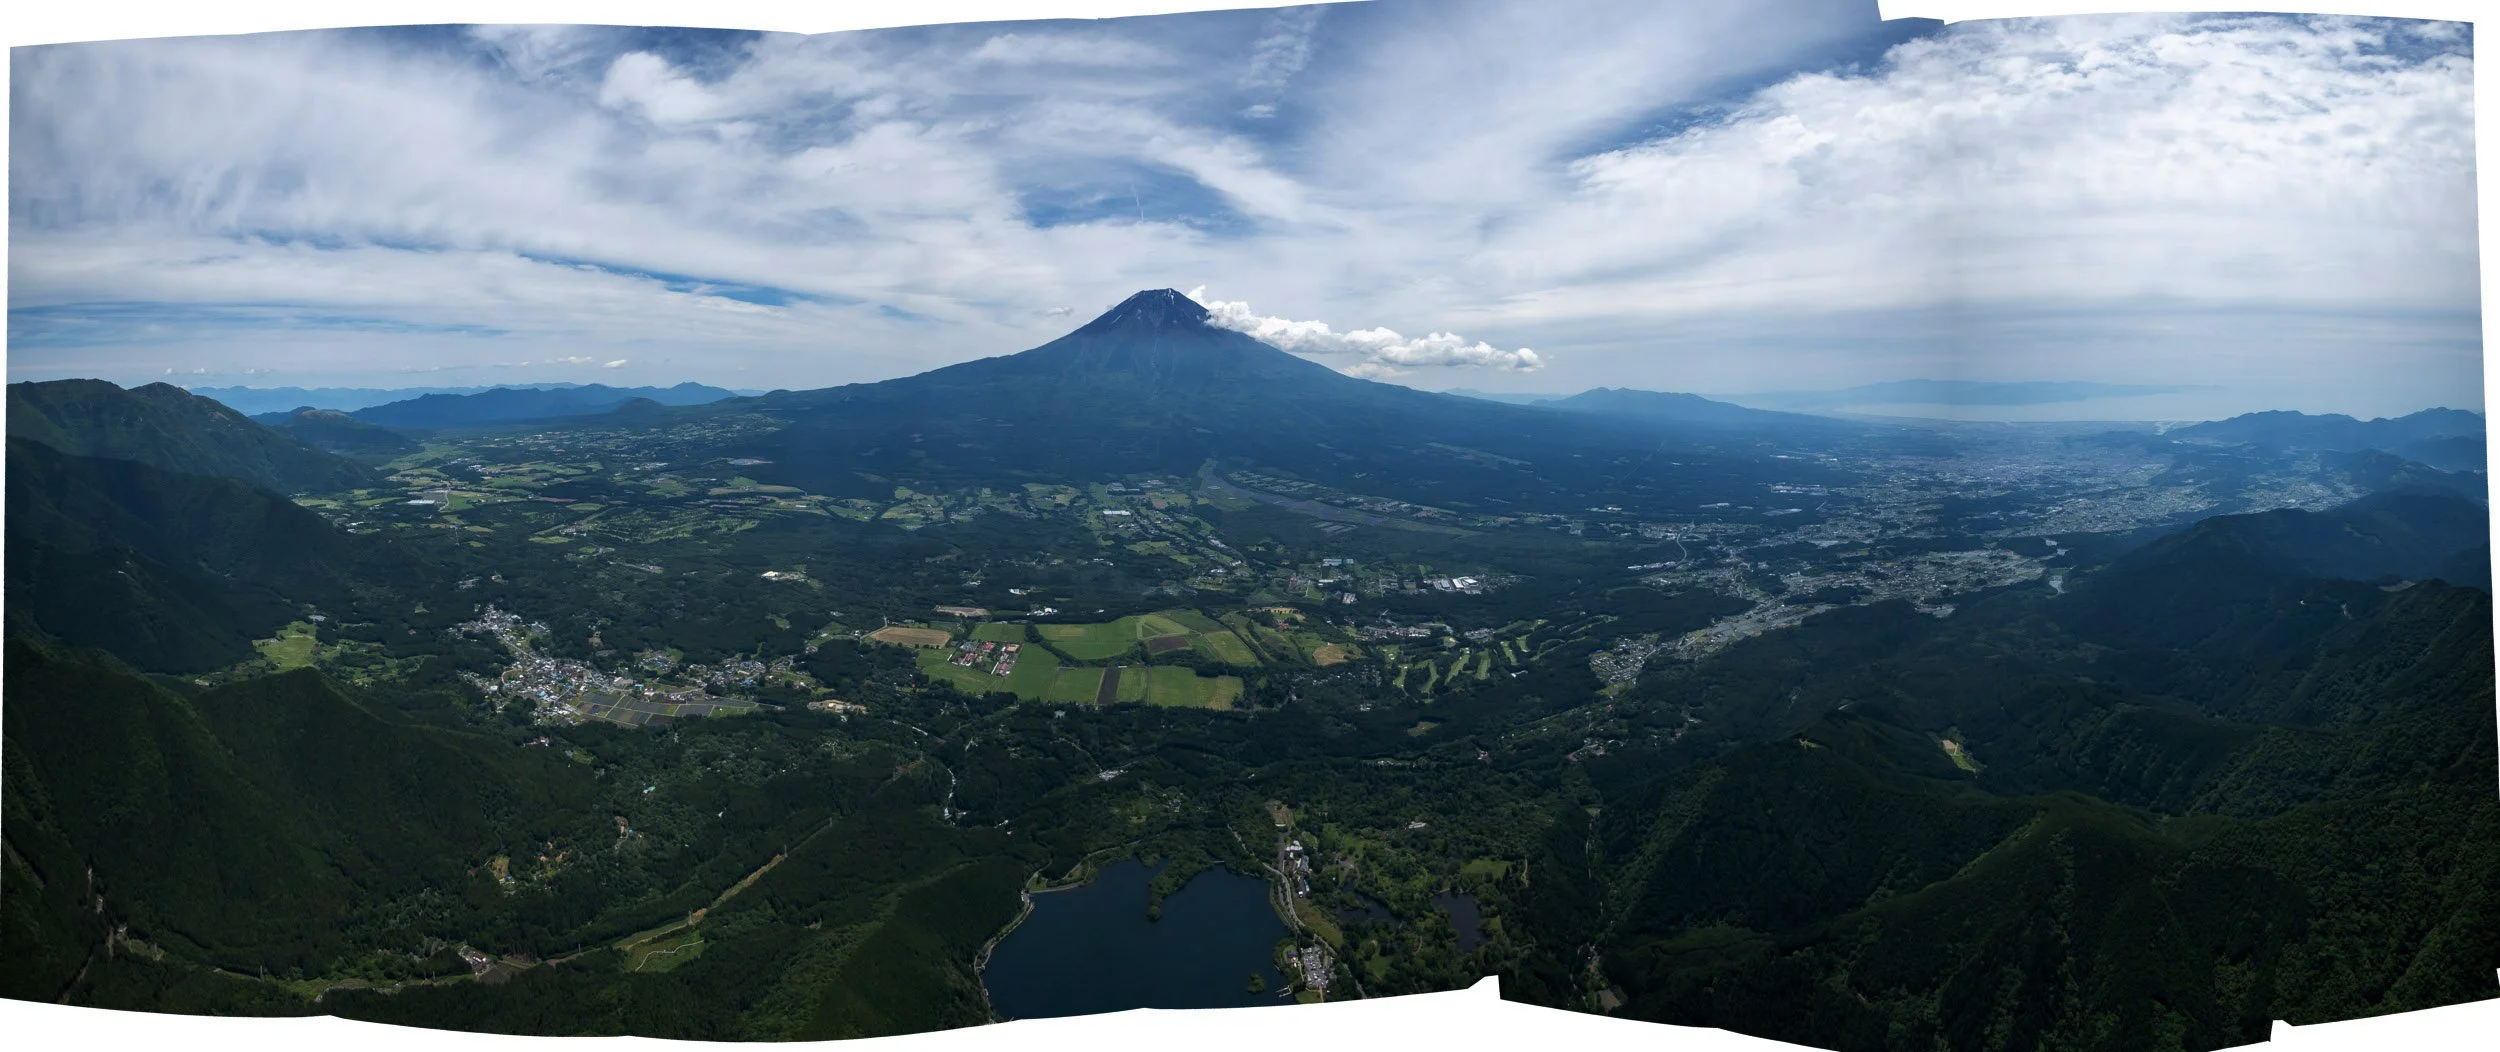
Photoshopにてスティッチング
今回、久しぶりにスティッチングをするのに写真現像ソフト「CaptureOne」とみなさんおなじみ「Photoshop」、2つのスティッチング機能を設定や条件を変えて色々試してみました。撮った写真は重なっている部分が多いのでわざと3分の1となる10枚くらいに絞ったほうがデータが軽くなるし、精度が逆に上がるかもと考えたからです。ですが試した結果わかったのはどうやら素材となる写真は多いほうがいいみたいです。なので約30枚のすべての写真でスティッチしたのが上の写真というわけです。
I tried various settings and conditions for stitching using two well-known stitching features, the photo development software "CaptureOne" and "Photoshop." Since there were many overlapping areas in the captured photos, I intentionally narrowed it down to about ten photos, which would reduce the data size and potentially improve accuracy. However, I found through experimentation that having more photos, better results. That's why I stitched together all the approximately 30 photos to create the photo above.
結果として、CaputureOneのほうが精度が高かったです。
具体的にはPhotoshopのスティッチング結果は写真右側の方に縦に暗い帯状の「ムラ」が出てしまいました。つなぎ合わせる写真を10枚くらいに絞るとこの帯状のムラが5,6本発生する現象もおきました。対してCaptureOneはどの条件でも安定した結果をだしてくれた印象が強いです。また、スティッチング結果の写真の範囲もCaptureOneのほうが広いことがよく見るとわかるかと思います。
As a result, CaptureOne had higher accuracy. Specifically, the stitching result in Photoshop had a vertically dark line appearing on the right side of the photo. When I stitched ten photos, this dark line appeared 5,6 more. On the other hand, CaptureOne consistently produced better results under any conditions. Additionally, you can see that the range of the stitched photo is wider in CaptureOne.
実は昔、大学院の卒業制作でスティッチングを使った作品を作っていて、それなりにスティッチングの経験と知識がありましたが、今回の結果にはとてもびっくり。スティッチングのスピード、精度、ともに格段に上がっています。
大学院時代にスティッチングの作品を撮影するときはとても気をつかっていました。写真同士のズレがなくすために
・歪みの少ない単レンズを使う
・三脚の雲台部分を完璧な水平になるように設置
・分度器をつかってカメラのパンする角度を均一に
なんてことをしないとうまく繋がらなかったのです。
うまく繋がっていたとしても歪んだ写真になるので手作業で歪みを補正をしなければいけなかったりで1枚の写真を作るのに2,3日かかっていました。
In the past, when I used stitching for my graduate project, I was very careful. In order to eliminate misalignment between the photos:
I used a prime lens for minimal distortion.
I set up the tripod head to be perfectly horizontal.
I used a protractor to ensure a uniform panning angle for the camera.
The photos wouldn't stitch together properly if I didn't do these things. Even if they did, the resulting photo would be distorted, so I had to manually correct the distortion, which took two to three days to create a single photo.
ところが今回は不安定なパラグライダーに乗りながら手持ち、カメラもズームタイプのコンパクトカメラというスティッチ写真の素材としては決して向いていないはずなのに、こんなに綺麗に繋がったことにとても驚きです。
とくにCaptureOneは撮影された写真の角度のズレ、レンズの歪み、周辺光量の変化などをうまく検出して素材の良いところをうまくりようしてつなぎ合わせているのだろうと推測しています。
However, this time, despite being on an unstable paraglider and using a handheld zoom-type compact camera, which is not suitable as source material for stitching photos, I'm amazed at how well they stitched together. Especially with CaptureOne, I speculate that it detects the angle differences in the captured photos, lens distortion, and changes in peripheral light intensity, and utilizes the best parts of the material to stitch them well together.
ソフトの進化だけでなくパソコンの処理能力の向上なども関係はしているのでしょうが、、、
いやぁ、技術の進歩はすごいですねぇ。。。
Probably it is not about the software but also about the performance of the computer, I guess.
I am very surprised by the progress in technology.
スティッチングができたら丁度いい大きさに写真をトリミング→足りない部分は今話題のPhotoshop機能「ジェネレーティブ塗りつぶし」で補完。あとは写真の色を自分好みに編集して完成です。お気に入りの1枚が増えました。
Once the stitching process is done, I crop the photo to the perfect size, and any missing parts are filled in using the popular Photoshop new feature called "Content-Aware Fill." Then, I edit the colors of the photo to my style color.
今後は景色の良い日に飛べた時はこういった作品も作って行こうかな。
いつかこんな写真を超大きくプリントした写真展なんて出来たら素敵だな~。
I am thinking to take more stitch-panorama photos when I can.
It would be wonderful to have a photo exhibition someday featuring these